Step 1 - Open the Sorting and Packing tile
Open the Sorting and Packing tile on the dashboard. Within this tile, you will find all functionalities related to sorting, stock and deliveries.
Step 2 - Open the Delivery module
On the left-hand side of your screen, you will see the different modules. Click Delivery. The available sections will appear under this module.
Step 3 - Open Import
Within the Delivery module, click Import. You will now see an overview of all delivery notes related to import.
Step 4 - Open the delivery note
Search for the desired delivery note in the list. On the right-hand side, next to the delivery note, you will find the blue Open button.
Click this button to open the overview with all details of the delivery note.
Click this button to open the overview with all details of the delivery note.
Step 5 - Open the Codes tab
In the detail overview of the delivery note, you will find several tabs. Next to (Un)Sorted fruit, click Codes.
You will now see an overview of all codes linked to this delivery note.
You will now see an overview of all codes linked to this delivery note.
Step 6 - Open the details of an individual code
In the overview, you will find the individual codes under the different sections. On the right-hand side, next to the code, you will find the blue Details button.
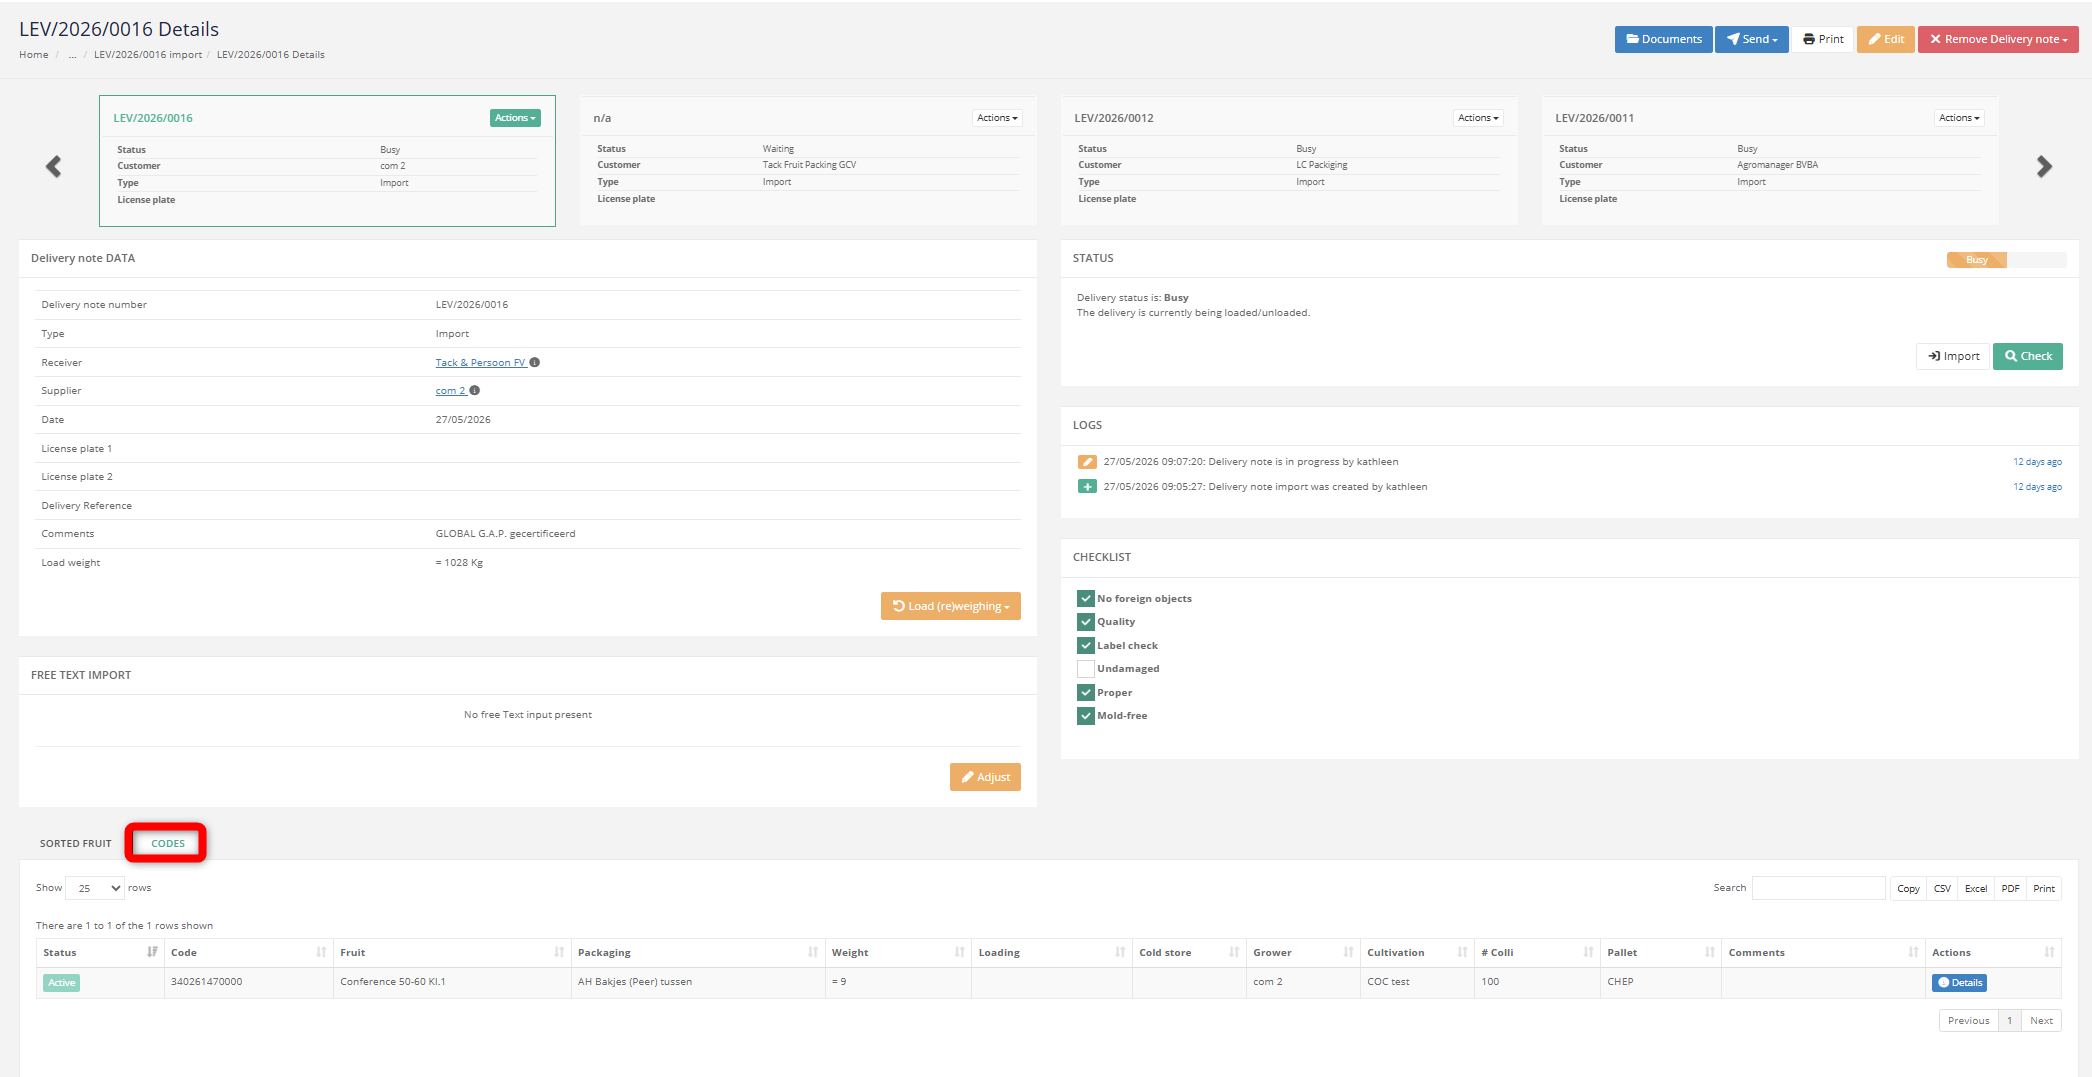
Click this button to open the screen with the details of the individual code.
Click this button to open the screen with the details of the individual code.
Step 7 - Print the individual code or edit the code
At the top of the detail overview of the individual code, you will find the Print button and the Edit button.
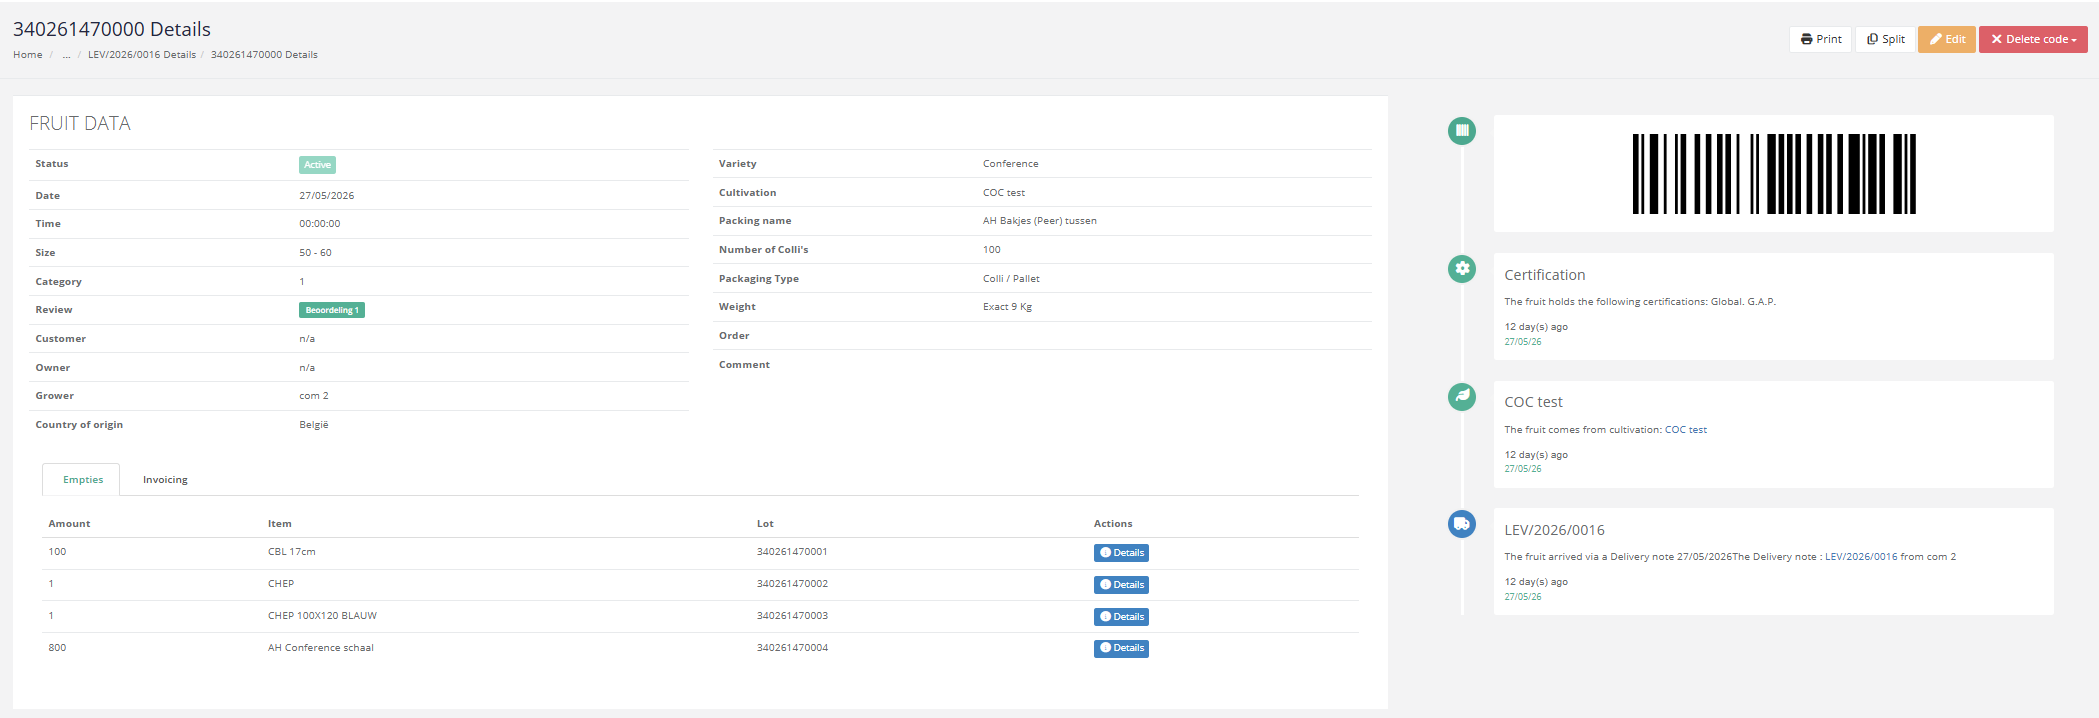
Click Print to print the code. Click Edit to change the details of the code.
Click Print to print the code. Click Edit to change the details of the code.
Step 8 - Delete an individual code
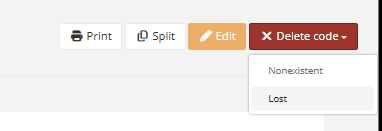
At the top of the individual code screen, you will find the red Delete button.
Click this button to delete the code. You will then be asked to choose why you want to delete the code.
Click this button to delete the code. You will then be asked to choose why you want to delete the code.
Step 9 - Delete a non-existent code
Select Non-existent when the code does not exist and needs to be deleted.
A confirmation question will appear on your screen. Click the red Delete button to permanently delete the code.
A confirmation question will appear on your screen. Click the red Delete button to permanently delete the code.
Step 10 - Delete a lost code
Select Lost when the code has been lost and needs to be deleted.
A confirmation question will appear on your screen. Click the red Delete button to permanently delete the code.
A confirmation question will appear on your screen. Click the red Delete button to permanently delete the code.
Step 11 - Indicate whether the empty packaging has been lost
When you delete a code as Lost, you will be asked whether the empty packaging has also been lost.
Select the correct answer.
Select the correct answer.
Step 12 - Check the status of the code
After deleting the code, you will return to the overview of the individual codes of the load.
For the code you have just deleted, the Status column now shows Deleted.
For the code you have just deleted, the Status column now shows Deleted.